3D Printed Robotic Hand: Part 4 - The 3D Printed Hand Build
3D Printed Robotic Hand: Part 4 - The 3D Printed Hand Build
Sep 19, 2017
Gerardo Ramos
In this post I will be going over in the building of the 3D printed hand. You can find the files from inmoov.fr. Inmoov is an open source 3D printed life size robot where you can print various parts of a robot. Here you can find the files to print the hand. I also found an instructable on instructables.com that has the files already ready to just download and print.
http://www.instructables.com/id/DIY-Robotic-Hand-Controlled-by-a-Glove-and-Arduino/
I started by printing the smaller prints at a few files at a time.
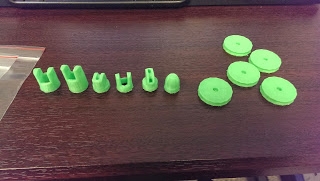
A printout of a finger and circular horns for the servos
I also separated the prints in ziploc bags to avoid confusion between the fingers since the fingers seem to be almost identical. I didn't want to mix up the pieces and create irregular fingers.
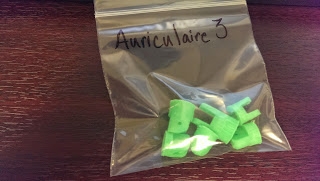
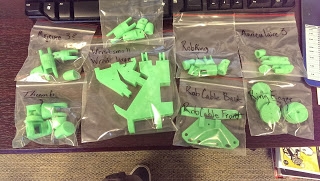
During the printing of the smaller pieces, I was working on the glove portion of this project. For the bigger parts of the robotic hand, I printed them overnight at Boca Bearings. I just started the prints before leaving for the day and hope that they will be done by the next morning. Sometimes that doesn't happen. Like when I printed several big pieces together such as in the picture below.
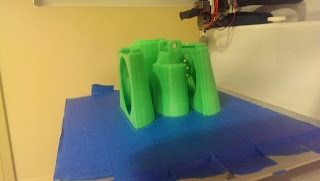
Parts of the arm
After having printed all the parts, I had to remove some supports that were printed on the parts. Some of the supports were fairly easy to remove but there were times where they were very difficult to remove. So I sometimes used a dremel tool get some of the supports off.
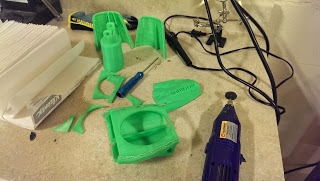
Since the dremel operates at high speeds, the PLA would heat up and deform. This created a problem with the fitment of some of the parts. To solve this I would sometimes use a file to remove some of the buildup that happened at the edges of the parts. I then started on assembling the hand. I started off by gluing the parts of one finger. The glue I used was epoxy glue for plastics by LocTite. There were instructions and diagrams of how they should be assembled on inmoov.fr. The fingers required me to file each part so the finger can move smoothly at each joint. Basically at every joint I had to file away some PLA to make the parts fit perfectly. I had to do this for every finger and for every part that you see below.
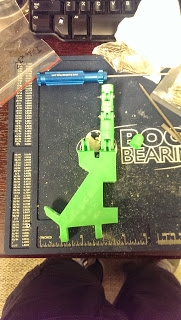
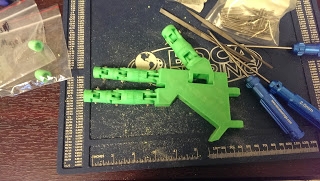
I used 2mm machine screws and nuts to keep the parts together at each joint of the finger. The holes of each piece were initially to small to fit the screws so I used Boca Bearings RC Tool Kit to make the holes bigger.
http://www.bocabearings.com/productdetail.aspx?ItemID=24674
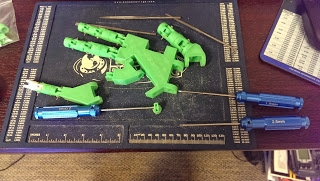
I used the 1.5mm tool to create a 1.5mm hole. Then I slowly increased the hole size with the 2mm tool. While I was making the hole at the top joint piece of the pinky finger, I didn't provide enough support to withstand the force of the tool so I ended up breaking it. So I decided to print another pinky to replace the broken part. I didn't notice that the PLA color in the 3D Printer was changed so I ended up printing a white pinky replacement.
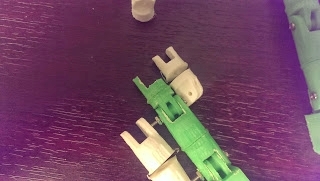
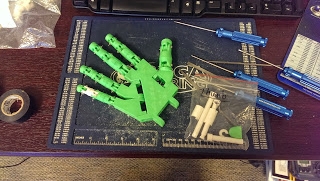
Afterwards, I finished up the hand except the finger tips. I didn't glue the finger tips at this time because I needed to run string through the fingers towards the top and then glue the finger tips. Before I do that I had to use some bolts to keep the pinky, ring finger, and thumb attached to the hand. The bolts were provided by inmoov.fr.
I found that the bolts that I printed were to big to run through base of the thumb, pinky, and ring finger. So instead of using the file to file away some PLA, since it's very tedious and time consuming, I just decided to remake them in Solidworks. The shape of the bolts are really simple to make so it didn't take much time. Here's a comparison of the bolt that I made with the original bolt.
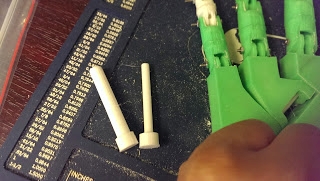
I used some epoxy glue to hold the bolts in. Afterwards, I went ahead and started to run string through the fingers. I got some fishing string from Jeff here at Boca Bearings.

Each finger needed two strings: one to close the finger and the other to open it. Each string I used was about 75cm long. This part was very time consuming.
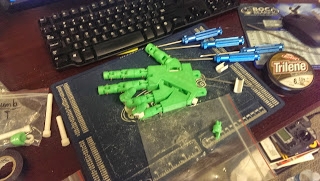
Once I had all the strings running through all the fingers, I tied a knot at the top of the finger for each string. I didn't get to take a picture of this since I was in my "zone" and forgot to take pictures along the way. I also forgot to take pictures at different parts of the project. I then glued each finger tip on. Then I decided to attach the hand with the wrist by using one of the 3D printed bolts. This is what the hand looked like so far.
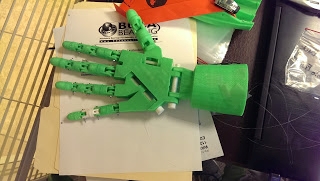
I then went ahead and started working on the servo bed for the robotic hand. The servo bed was intended for average size servos but I bought smaller servos, the TowerPro micro servos. So they didn't fit perfectly snug in the servo bed. Instead, they would just move around everywhere. So I just did some measurements of the servo bed and of the micro servos to find out how much space I need to fill with some more PLA. Instead of reprinting the servo bed with modifications, I decided to just add some blocks that I will be able to glue on the servo bed.
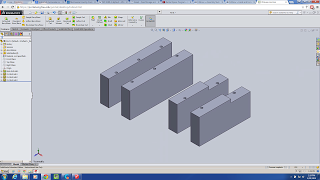
In the picture above, I made the blocks in Solidworks. I measure how thick the blocks should be to be able to fit the servos snugly. I also created holes were the servos will be screwed into with 2mm bolts. I glued the blocks into the servo bed and added the five servos in.
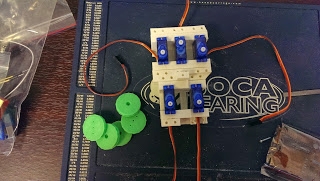
What I forgot to do, when I made the blocks in Solidworks, was to create holes in the block so the servo wire can run through the bottom as shown in the picture above. So I just used the dremel to cut some holes. I also forgot to account for the protrusion of the wires towards the bottom of each servo.So it was to tight for the servos to initially fit in. But with some filing I manage to get them fit nice and snug. I then added the horns for each servo.
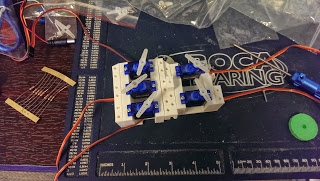
I then filed the two pieces of the bottom side of the arm and then glued them together. Once the glue was dried, I glued the servo bed inside the forearm.
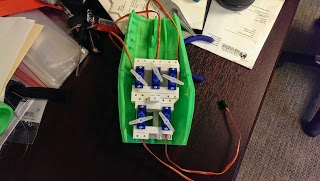
By now, I realized that the horns of the top three servos would interfere with each other. This would cause problems during the operation of the fingers. I later on decided to cut the horns since I wasn't going to use the outer holes of the horns. I compared the horns to the servo horns that I printed. I found that the the third hole from the center lined up with the holes of the 3D printed horns. So I decided to cut off the fifth hole. For the middle servo I also cut off the fourth hole to be able to fit the three servos.
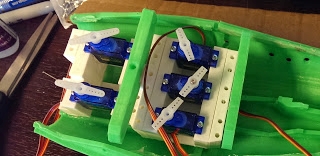
Then it was time to attach this portion of the arm to the wrist. I had to do some filing again to make it fit well.
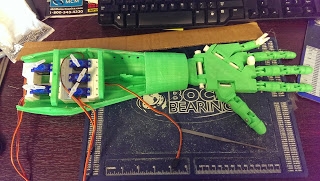
Around this time, one of the strings in the pinky finger was pulled to hard that it went through the whole hand and out. That meant that the knot I had tied wasn't big enough to not fit through the holes where the string runs through. So I had to remove the tip of the pinky finger to be able to retie the string again. Luckily, I still had the remaining pieces of the pinky that I printed when I broke the pinky piece. So I ended up with a white pinky. I then started to add the hand covers and the finger covers on top of the hand as shown below.
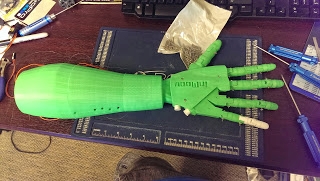
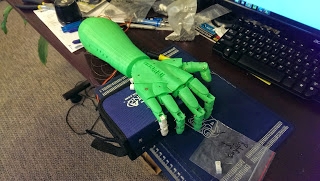
I used the same size screws that I used for the fingers. But sometimes those screws were too long so I ended up using some short screws that I found lying around. I then went ahead and started to tie the strings onto the horns of the servos. I used hot glue to keep the strings on the horns. I decided to test the servo horn versus the 3D printed circular horns.
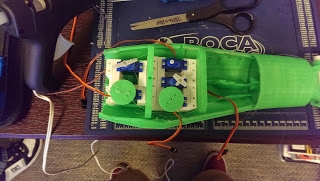
In the end I decided to use the servo horns since it seem to operate the pinky well. I also decided to use the servo horns because of the code that I was going to use. The code that I am going to use is from this instructables
http://www.instructables.com/id/Wireless-Controlled-Robotic-Hand/
I followed his procedure in how to tie the strings on the servo horns. I also didn't used the circular horns since there was no space in the 3 servo section of the bed. I then went ahead and started to tie the strings to each horn. I would turn the servo clockwise until its final position. Then I would pull on the closing string until it closes the finger. Then I hot glued the string onto the horn. I then turned the servo all the way onto its other end. Then I pulled on the opening string and hot glued it on the horn. While I was doing the thumb, I accidentally pull one of the strings too hard and broke the string.
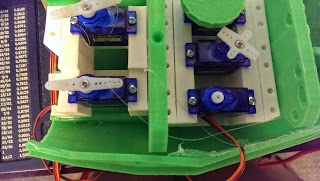
So I decided to do some googling to learn how to tie two fishing strings together.So I learned how to tie a uni-knot and tied a uni-knot on the broken string.
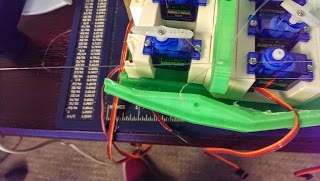
I hope this won't affect its performance. It took some time in getting the strings in the right position of the horns and trying to avoid tangling the strings. But I eventually finished doing all the strings.
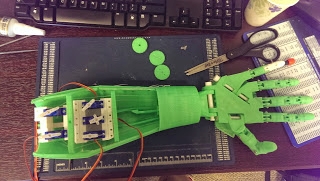
I noticed that there was some issues when turning the servos by hand. The pinky worked fine. But some of the other servos wouldn't either close a finger all the way or open the finger all the way. Since I used hot glue, I can just reapply heat and try to calibrate the strings again. Sometimes, one string wouldn't let the other string do its job. It was as if the strings were to tight. I think the solution to this would possibly be by using a more outer hole of the horn to allow more movement. I will do this later on after I have done the programming. I went ahead and started to work on the electronics portion of the hand, like the shields and the Arduino Uno.
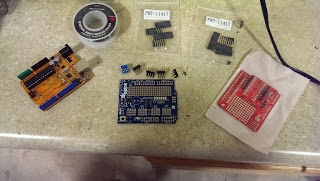
I ended up ordering an XBee shield from sparkfun.com for about $15. I also ordered stakable headers from them and ordered an Arduino Uno clone from 16Hz on ebay for $15. I had to solder on the stackable headers on the Adafruit Servo shield and the XBee shield. Also for the servo shield, I had to solder on the pins for the connections of the servos and the power block. I started soldering the headers on the servo shield by putting the shield upside down on the headers.
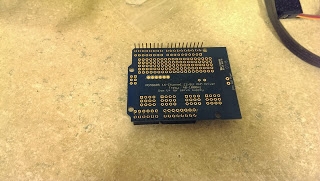
I did what I did before for the motor shield for the line follower that I made. You can check it out on here on this blog. I just soldered one pin of each individual header. Then I check if it lines up well with the headers of the Arduino by checking if it stacks into place. I had to reheat one header to readjust it. Afterwards, it was good. Then I continued to solder the rest of the pins onto the shield. I then soldered on the servo pins and the power block. I repeated the same for the XBee shield. The final work looked like this:
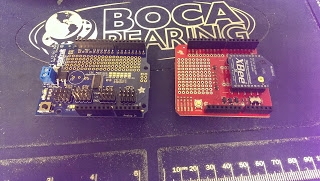
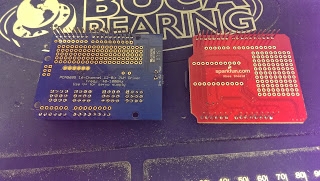
I then went ahead and tested the shield with one of the servos of the robotic hand. I uploaded an example from the shield library to test the servo. Here's a quick video of it being tested.
If you have any questions or would like to know anything about the setup, just drop a comment and I'll try to get back to you as soon as possible. And if you have any suggestions, just drop a comment.
