Boca Bearings Workshop Weekly Update 10
Boca Bearings Workshop Weekly Update 10
Mar 05, 2018
Kurtis Rodriques
The Powerwheels car is close to its first test run! So since the last update I have managed to remount/relocate the motor to a different position so that it would be easier to get the chain on and off. With that being said, we now finally have a mounted chain with the correct tension. We used the standard T8F chain. The gas pedal (throttle) was also mounted to the front of the chassis and that is held in place with two 4” bolts with adjusting nuts on the bottom and nylon lock nuts on top for adjustability.
The brake pedal was also installed. This was rather interesting as I used leftover materials to assemble the brake. I started off by notching the frame a little in the area that I wanted the pedal to be at. I notched it for the purpose of giving physical support to two 608 bearings. I then put a threaded rod into the two bearings so that it can swivel freely. I then proceeded to cut two pieces of steel that are about 2.5” long each and drilled two holes into each piece. One hole on the bottom for the threaded rod and another hole for the support bolt. The support bolt also has 3 spacers on it to provide a good contact surface between the plates. So the idea now is to just have a link go from the pedal to the master cylinder for the brake, and that will be accomplished by using two ball-joints.

The steering also went under serious modifications within the past week. So, the steering shaft has been mated with the bearings by going through both of them allowing for about 1.5 feet of bar stock to be sticking out towards the driver. I had to cut down the other end of the shaft as it was too long for our application. I cut and sanded down the end that went to the tie rods and welded the tie rods plate to the shaft.


The steering “rack” itself also got cut and rewelded as the turning of the wheels were at and angle and this would have caused premature wear of the tires and it wouldn’t provide a good enough turning radius to compensate for the length of the car. I also took the swivel joints of the “rack” off too, and I reoiled them with some Lightning Lube for smooth turning.

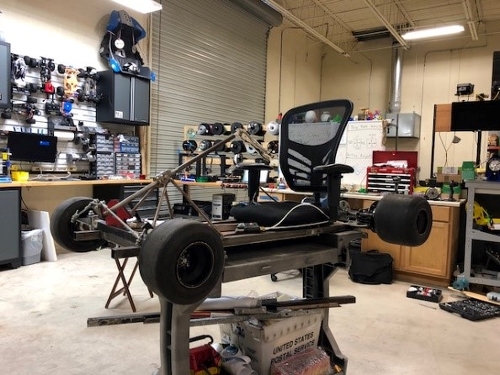
The car also has a seat now. I reused an old and broken office chair for our seating arrangement. The bottom of the chair is bolted onto the chassis in 4 different areas. On the bottom of the car is a steel bar that provides solid compression force that sandwiches the frame between the bottom of the chair and the metal bar. This allows for the bottom of the chair to be adjustable! The backing of our seat was also reused from the same office chair. With a hole saw and a 13” 2x4 piece if wood it made it possible to have it mounted correctly in the X & Y plane. Schedule 40 PVC piping is bolted into the back and frame to provide rigidity in the Z plane for when someone sits.


I also cut a small piece of plywood to be our flooring for the front of the car too. This it to improve the under-chassis aerodynamics as well as keeping road rubble and water out of the cabin of the car. The electronics should be hooked up next week so we can do our first stress test and maybe our first drive.
