Recoding the push button on OTTO Robot
Recoding the push button on OTTO Robot
Jul 01, 2021
Tyler Gilley
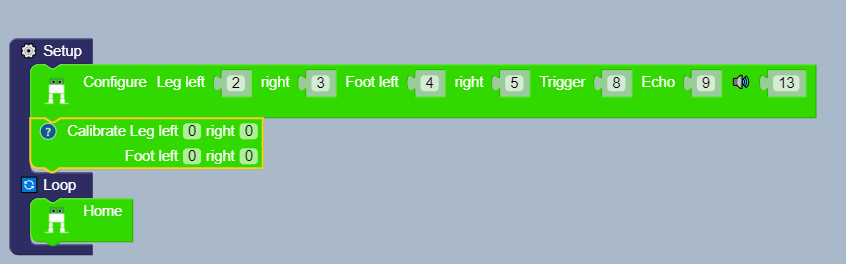
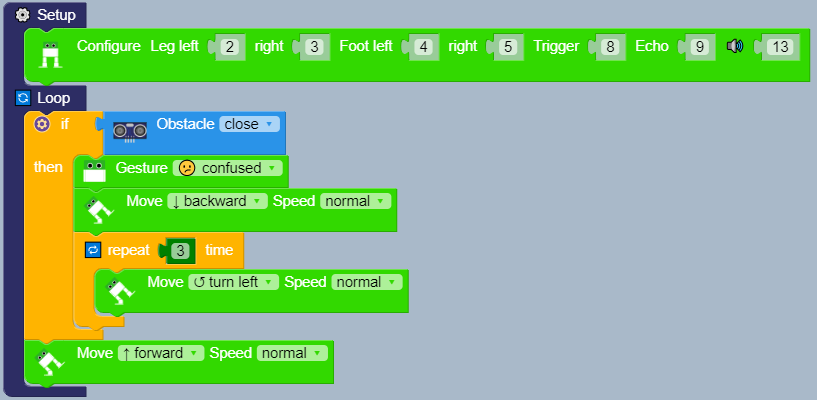
Upon receiving this kit, I was informed that the OTTO robot did not work outside of its USB port connection. For example, the OTTO DIY Robot has a USB connection that gives it the ability to import code into an Arduino circuit Board, once properly connected to a computer or laptop. The obstacle I was given was that the robot was unable to operate off its push button system controlled by 4 AA batteries. With this being said my first step was to change out the batteries to see if they were dead. In doing so, I found this was not the problem. My next thought was that the code may be the issue, so I installed OTTO BLOCKLY which is a free open-source programming engagement designed to make coding for the OTTO DIY Robot plain and simple. Once installed, I connected the Robot to the proper serial port and imported three different kinds of sample code given in the program. The first was a simple leg calibration to make sure the robot could walk properly, the second was a walking function, and the third was code to make the robot avoid obstacles when walking.

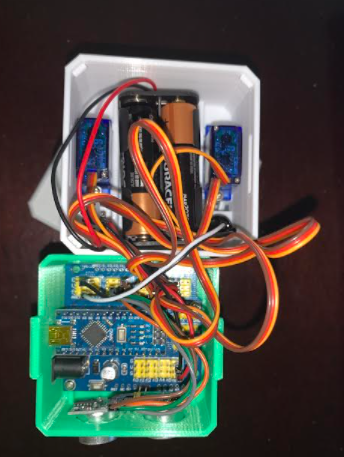
After trying all three functions and none were successful, I moved to the idea of completely rewiring the system. With this being said I started by unplugging all of the female wires from the Arduino board and followed a wiring schematic found on the OTTO DIY website to reassure that everything was plugged in Properly. I found that nothing was wrong with the installation of the servo motors that power the robot's legs, as well as the ultrasonic sensor. The only thing left to connect was the 4 AA power source. When looking at the schematic compared to what the robot already had plugged in, I found that the positive and negative connections were not placed properly on the board. Once corrected the Robot fired up properly and started walking without a USB connection. Listed below are some photos of the deconstruction and reconstruction the OTTO Robot went through.
Figure1: Deconstruction

Figure 2: Reconstructio